
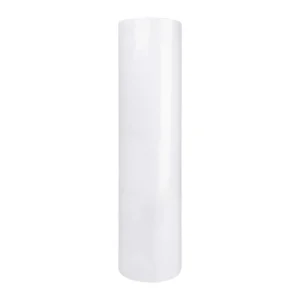
Embroidery Heavy Weight Cap Backing (3.0 oz) 3.75″ x 250 Yard Roll
Elevate Your Cap Embroidery with Heavy Weight (3.0 oz) Cap Backing Roll
Enhance your cap embroidery projects with the Heavy Weight (3.0 oz) Cap Backing Roll. Crafted to provide superior support and stability, this backing roll is tailored for all caps with low to medium stitch counts.
$33.22
Description
Embroidery Heavy Weight Cap Backing Key Features:
- Optimal Support: With a substantial weight of 3.0 oz, this cap backing roll ensures optimal stability for your cap embroidery. It’s designed to maintain your design’s integrity and precision, even on challenging cap materials.
- Low to Medium Stitch Counts: Specifically formulated for caps with low to medium stitch counts, this backing roll is a versatile solution that guarantees excellent results across a range of cap designs.
- Recommended Needle: To further enhance your cap embroidery experience, we recommend using a 75/11 or 80/12 sharp point needle. These needles are tailored for finished caps, ensuring precision and minimal disruption during stitching.
- Consider Titanium Needles: For peak performance, consider utilizing titanium needles. Known for their robustness, resistance to glue buildup, and reduced breakage, these needles can elevate the quality and efficiency of your cap embroidery projects.
Cap Embroidery Excellence:
Unlock the potential of your cap embroidery with the Heavy Weight (3.0 oz) Cap Backing Roll. Achieve consistent, professional results on caps with low to medium stitch counts, knowing that the stability and support of this backing roll will make a significant impact. Elevate your cap embroidery experience and impress with every stitch.
Technical Specifications
Using Heavy Weight (3.0 oz) Cap Backing for Cap Embroidery
Step 1: Prepare Your Machine
- Ensure your embroidery machine is set up and properly threaded with the desired thread colors for your cap design.
Step 2: Hooping
- Hoop the cap backing along with the cap stabilizer, making sure they are taut and securely in place. Ensure the backing is aligned with the design area on the cap.
Step 3: Load Your Design
- Load your cap embroidery design into your embroidery machine’s software. Adjust the design’s position and size according to the cap’s dimensions.
Step 4: Position Your Cap
- Place the cap onto the hooped backing and stabilizer, ensuring it’s centered and aligned with the design area.
Step 5: Embroider Your Design
- Begin the embroidery process, allowing your machine to stitch out the design onto the cap. Monitor the stitching to ensure everything is progressing smoothly.
Step 6: Completing the Embroidery
- Once the embroidery is complete, carefully remove the cap from the hoop. Trim any excess threads and inspect the design for quality and accuracy.
Step 7: Finishing Touches
- After embroidery, you may need to perform additional steps based on your design and cap material. These may include steam pressing, trimming excess backing, or cleaning up any loose threads.
By following these steps, you can successfully utilize the Heavy Weight (3.0 oz) Cap Backing to achieve professional-quality cap embroidery results. Enjoy the stability and support this backing provides, allowing you to create standout cap designs with ease.
Technical Sheets / Safety Data Sheets / Documents
Video
Reviews
Only logged in customers who have purchased this product may leave a review.
You May Also Like
Related products
-

Embroidery 3D Foam 3MM – 12″ x 18″ – Add Dimension to Your Designs
$2.99 -
Embroidery No Show (1.5 oz) Cutaway Backing Perforated Rolls
$41.82 – $54.99 -
Embroidery Backing Extra Heavy Weight (3.5 oz.) Tearaway Cap Backing (250 Pack) – For Structured Stability
$13.76 -
Embroidery Backing 20″ Wide Medium Weight (2.5 oz.) Cutaway Backing Rolls – for Professional Stitching
$25.85 – $42.26

Reviews